Thinking about designing your own wand? On this page of the notebook I've compiled 11 tips to help you create the perfect design.
Level: APPRENTICE | JOURNEYMAN | MASTER - Tips for all wandmakers, regardless of level!
If you want a wand that feels like it jumped out of the Harry Potter film universe and into your hands, then it would be a good idea to follow the guidelines... or not - wands are very personal, so as long as you are happy with how it looks, it's good! Without further ado, let's jump in.


The Principles of Wand Design
Tip #1: Choose one, maybe two elements at most to be the design focus.
Figure out what you want the main design of the wand to be and focus on that. For example, Harry's wand has the root handle, the Elder Wand has the spaced bumps and the white divider, Sirius Black's has runes and the swirly carvings, Remus Lupin's has the bulb handle. Design the rest of the wand to complement these main elements and to show them off.Tip #2: Don't over-design!
It's tempting to try to incorporate every element that appeals to you, but in general this makes for a design that feels too busy. Just look at how the great Renaissance painters use perspective and negative space to make the subject stand out. If your eye is drawn to all of elements, then it will see none of them.
Tip #3: Keep the various elements thematically unified.
You can make your designs more complicated by including more than two main elements, but in that case try to keep the various elements thematically unified. Take a look at Narcissa Malfoy's wand for a good example - it has lots of bells and whistles, but the whole thing is black with silver accents - a very elegant aesthetic. My own Beethoven wand has a lot going on, but it symbolically represents his role as the transition composer from the structured Classical period to the more free-form Romantic period of music. It is also thematically unified by the similarity to a conductor's baton.
| The Beethoven wand. The shaft design is quite complex, but the whole design is thematically unified. |
Tip #4: Make the handle a little less than 1/3 of the total length.
At the end of the day, handle/shaft balance is personal preference, but if you are new to wand design then the 1/3 balance is a good starting point. This ratio seems to be common in wand designs by the HP films' production artists, but for wands that have pommel-heavy designs - like a conductor's baton - this ratio may swing closer to 1/4 or even 1/5. See Queenie Goldstein's or Nicolas Flamel's wands from Fantastic Beasts.
 |
| Queenie Goldstein's wand. Source: Universal Orlando |
Tip #5: Take into account the properties of the wood.
If your wand will actually be carved from wood, keep in mind that wood is an organic material that has natural variations in grain, texture, staining uniformity, etc. This is where it is important to take into account those properties when designing, and even use them to your advantage. For example, pine has a prominent ring structure where the soft parts will absorb stain readily, but the hard parts won't. Choosing pine for a dark-stained wand with lots of detailed, intricate carving wouldn't look great (such a design would be better-suited to a fine-grained wood like alder or cherry), but a simple, bulbous design would look amazing.Tip #6: Don't go (too) crazy with color.
Well, unless that 's your thing, in which case go right ahead. In the mainline HP films, the wands rarely have more than two colors. They are usually various shades of one color, or one color with a contrasting accent. A notable exception is Alecto Carrow's wand with four (!) colors total: the handle has a swirl of three colors of equal prominence, and they are distinct from the color of the shaft and pommel. See also Professor McGonagall's wand, where the handle and shaft are two shades, and the handle end has a contrasting white pommel.
 |
| Alecto Carrow's Wand with its tri-color handle. Source: Noble Collection UK |
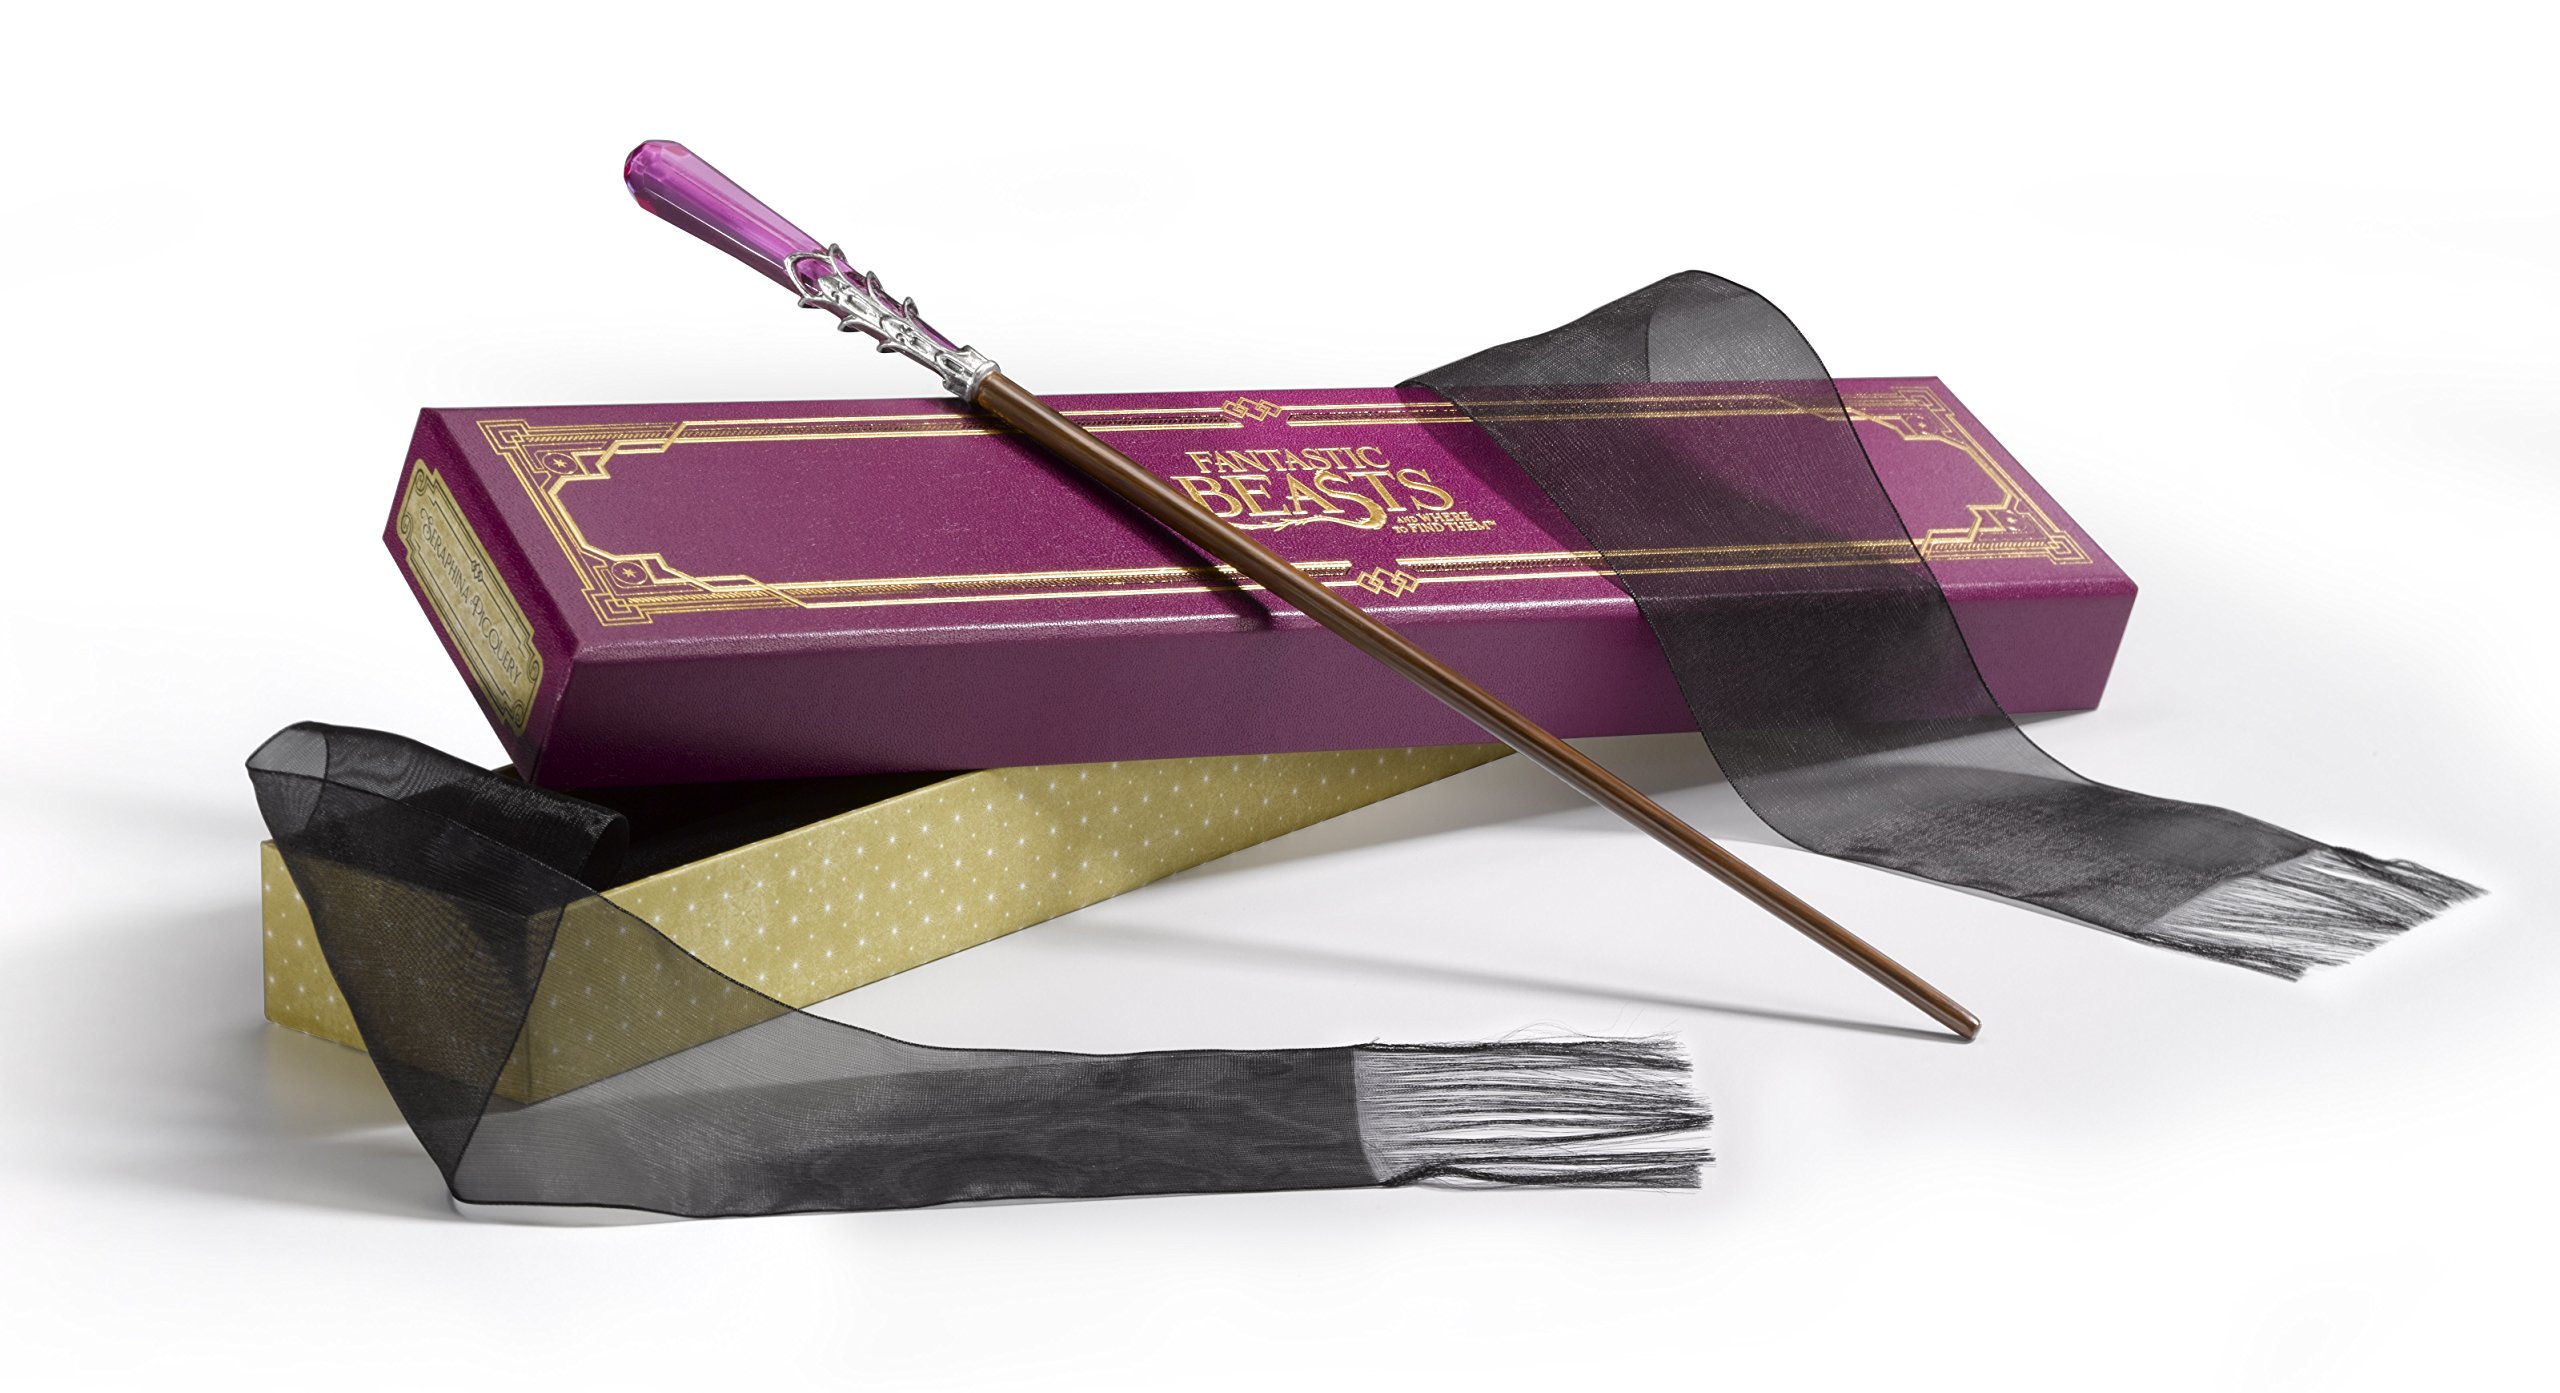
The Fantastic Beasts films are are different story - the prop designers incorporate non-wood/metal accents with pretty much every wand! See Seraphina Picquery's for the most egregious "offender," though the use of color is good and overall design is very pretty. From a worldbuilding perspective this may be ok, seeing as how these wands are not made by Ollivander.
 |
| Seraphina Picquery's wand. It's purple. PURPLE!! |
Tip #7: When including references to other series, don't be too on-the-nose with logos or icons.
If I were to design a Pokemon wand, I wouldn't just etch the pokeball symbol onto an otherwise plain design and call it a day. That said, exceptions exist, like the Seal of Rassilon or circular Gallifreyan from Doctor Who. These look great as prominent woodburning elements because a logo on a simple design reflects the sleek, sci-fi aesthetic of that particular series. A similar case could be made for Star Trek iconography. In general, make your references using the shape and feel of the wand, not with surface designs. If you must use surface logos, dress them up a bit.
Tips For Sketching the Design
Tip #8: Sketch, sketch, and then sketch some more!
Spend more time drawing than thinking. Your first priority is to get your ideas down on paper. Then draw more. Experiment with variations. Along those lines, don't get too attached to a draft design. Always try to improve it and change things to see if they might look better before setting it as the final version.Tip #9: Think about the shape of the starting piece of wood.
If you are designing a wand to be carved from a 1/2" (12 mm) diameter dowel, making a very curvy wand will be close to impossible. Of course, if you select the wood after you design, then this is a non-issue!
Tip #10: In general, line art first and color later.
An exception is when your main design element is color-based, then sketching in color might be a good idea so you can see how the elements should contrast.Tip #11: It's totally fine to look at other people's designs for inspiration!
There are many great wandmakers out there. Feel free to study what they have done with their designs. Just don't copy them too closely, lest you lose your own individual voice. See what's out there and make it your own!
There you have it! I hope these tips prove to be helpful when designing your own wand. What else have you learned about wand designs? If you have guidelines or tips of your own, or a design you want some feedback on, share it in the comments!
See you on the next page,
Maranda
There you have it! I hope these tips prove to be helpful when designing your own wand. What else have you learned about wand designs? If you have guidelines or tips of your own, or a design you want some feedback on, share it in the comments!
See you on the next page,
Maranda


Is it possible to hand carve designs that pop out of the shaft (similar to the vines in Hermione's wand) or do I need a special tool?
ReplyDeleteIt is absolutely possible! This kind of carving is called "relief carving." I'll have another blog post on how to carve vines in the future, but you can do it with a few mini/micro gouges and a small carving knife. The basic gist of it is: 1) Draw out the vines on the wood with a pencil. 2) Gouge away the wood on either side of the vines. Use a U gouge to remove material quickly, then a V gouge to get sharp lines. 3) Use your knife to whittle away the wood surrounding the vines. No special tools needed!
DeleteHow would one carve a design with vertical lines (going with the grain)? Is this possible with a knife?
ReplyDeletei wish to use a stone handle for my wand or take inspo from example black diamond in some way. is that possible with a wand of 1/3, purpleheart wood?
ReplyDeleteI'm confused, in the movies, the wands are significantly longer than the allotted "11" inches, using Harry's wand as an example; If I wanted to make a book accurate one, would I make my overall length include the handle, or add the handle onto the overall length of the shaft?
ReplyDeleteI've been puzzling it out all day!