So you want to make a wand of your own? That's wanderful! (awful pun, I know) "But I don't know where to start!" you say. Not to worry, there are wandmaking methods appropriate for every age and skill level. On this page of the notebook, we'll be looking at two methods that do not require woodworking and discussing their pros and cons. Read on to find the one for you, or check out the Wandmaking Workshop to learn about carving one from wood.
METHOD 1: PAPER (OR CHOPSTICKS) AND HOT GLUE
For very young kids (who aren't old enough to attend Hogwarts, let alone be given a wand - you'll poke your eye out!) there's the tried and trusted paper rolling method. Take a sturdy piece of craft paper, and roll it into a tight tube, adding some glue every so often so it doesn't unravel on you. Decorate with paint and markers to your heart's content. Older wizards-to-be can use a hot glue gun to add raised accents, and replace the rolled paper with a chopstick, tree branch, or wood dowel.
With some creativity, you can even recreate some of the wands wielded by famous witches and wizards! Check out this paper-and-hot-glue version of the Elder Wand by Timboscreations:
You can do a lot with clay and dowels, so let's look at some of the pros and cons.
First, the cons:
We've looked at two of the more common methods of wandmaking that don't involve carving wood, but there are certainly others, like 3D printing or sculpting with resin. Which methods have you tried? Do you know of any pros or cons that I missed? Let me know in the comments!
See you on the next page!
METHOD 1: PAPER (OR CHOPSTICKS) AND HOT GLUE
For very young kids (who aren't old enough to attend Hogwarts, let alone be given a wand - you'll poke your eye out!) there's the tried and trusted paper rolling method. Take a sturdy piece of craft paper, and roll it into a tight tube, adding some glue every so often so it doesn't unravel on you. Decorate with paint and markers to your heart's content. Older wizards-to-be can use a hot glue gun to add raised accents, and replace the rolled paper with a chopstick, tree branch, or wood dowel.
With some creativity, you can even recreate some of the wands wielded by famous witches and wizards! Check out this paper-and-hot-glue version of the Elder Wand by Timboscreations:
 |
| With a few different shades of brown acrylic paint, you can get it looking quite cool. The secret to hiding paper edges is to use several layers of primer until they're not longer visible! |
Let's start with the cons of this method:
- Setting aside the obvious fact that hot glue and paper isn't wood, it's difficult to recreate the look and feel of wood using hot glue. The textures are very different.
- Limited designs. It's difficult to get smooth curves with the hot glue because it cools and hardens too quickly to do any real shaping. Therefore you're more or less limited to clumping up the glue or making those stringy lines that are hard to disguise as anything but hot glue.
- Not built to last. Especially with the rolled paper method, these wands can fall apart quickly, and don't even think about it if you drop them in water, unless you finished it with many, many coats of varnish. Using chopsticks or a wood dowel is better, but the paint may chip, and the hot glue could peel off.
- Lots of fun! This wand craft great fun to do with kids or with friends. The freedom of paint means that you aren't limited to browns and blacks if you don't want to be, and you can use other colors that might normally be considered "unusual" for a Harry Potter-style wand.
- Low-cost and easy to replace. Paper is cheap. Paint is cheap. A hot glue gun and hot glue is cheap. A pair of disposable chopsticks from your local Chinese food establishment are included with your lunch take-out. Lost your wand? No problem, make another in just a few minutes.
- Fast crafting time. If you need a lot of convincing wands (if you look from a distance, anyway), and you need them now, this is probably the best way to make a large quantity of wands. There's very little waiting even if you use multiple coats of paint.
- Safety. There's no risk of cutting yourself with sharp woodworking tools, no risk of breathing in sawdust. Kids who are given rolled paper wands can flail about with reckless abandon and not worry about stabbing themselves or breaking an expensive collectible. That said, just don't burn yourself on the hot glue gun.
METHOD 2: POLYMER CLAY
Time for some Art 101! Unlike woodworking, which is a form of subtractive sculpture where you take away unneeded material to leave the finished product, clay is a form of additive sculpture: you add clay and build up to the finished product. Polymer clay doesn't harden until you bake it in the oven, so unlike the hot glue method which dries quickly, you have a lot of time to fine tune your design before committing to it.
Use a chopstick or wood dowel as a base, something that can go in the oven and not catch on fire. Take polymer clay and sculpt the handle and other details. Bake (though the directions on the package may not necessarily give you the best results - experiment to see what works for you), add extra details with paint if you like, seal with varnish, and done.
Check out these amazing polymer clay wands!
Check out these amazing polymer clay wands!
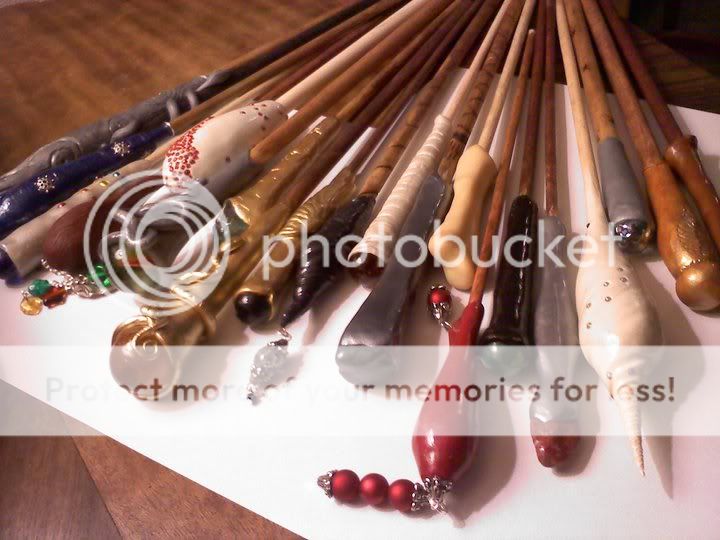 |
| This batch is by Unladylikely and her friend on craftster.org. I love the surface details and variety here! The white wand (fourth from the right) reminds me of a seashell and is particularly eye-catching. |
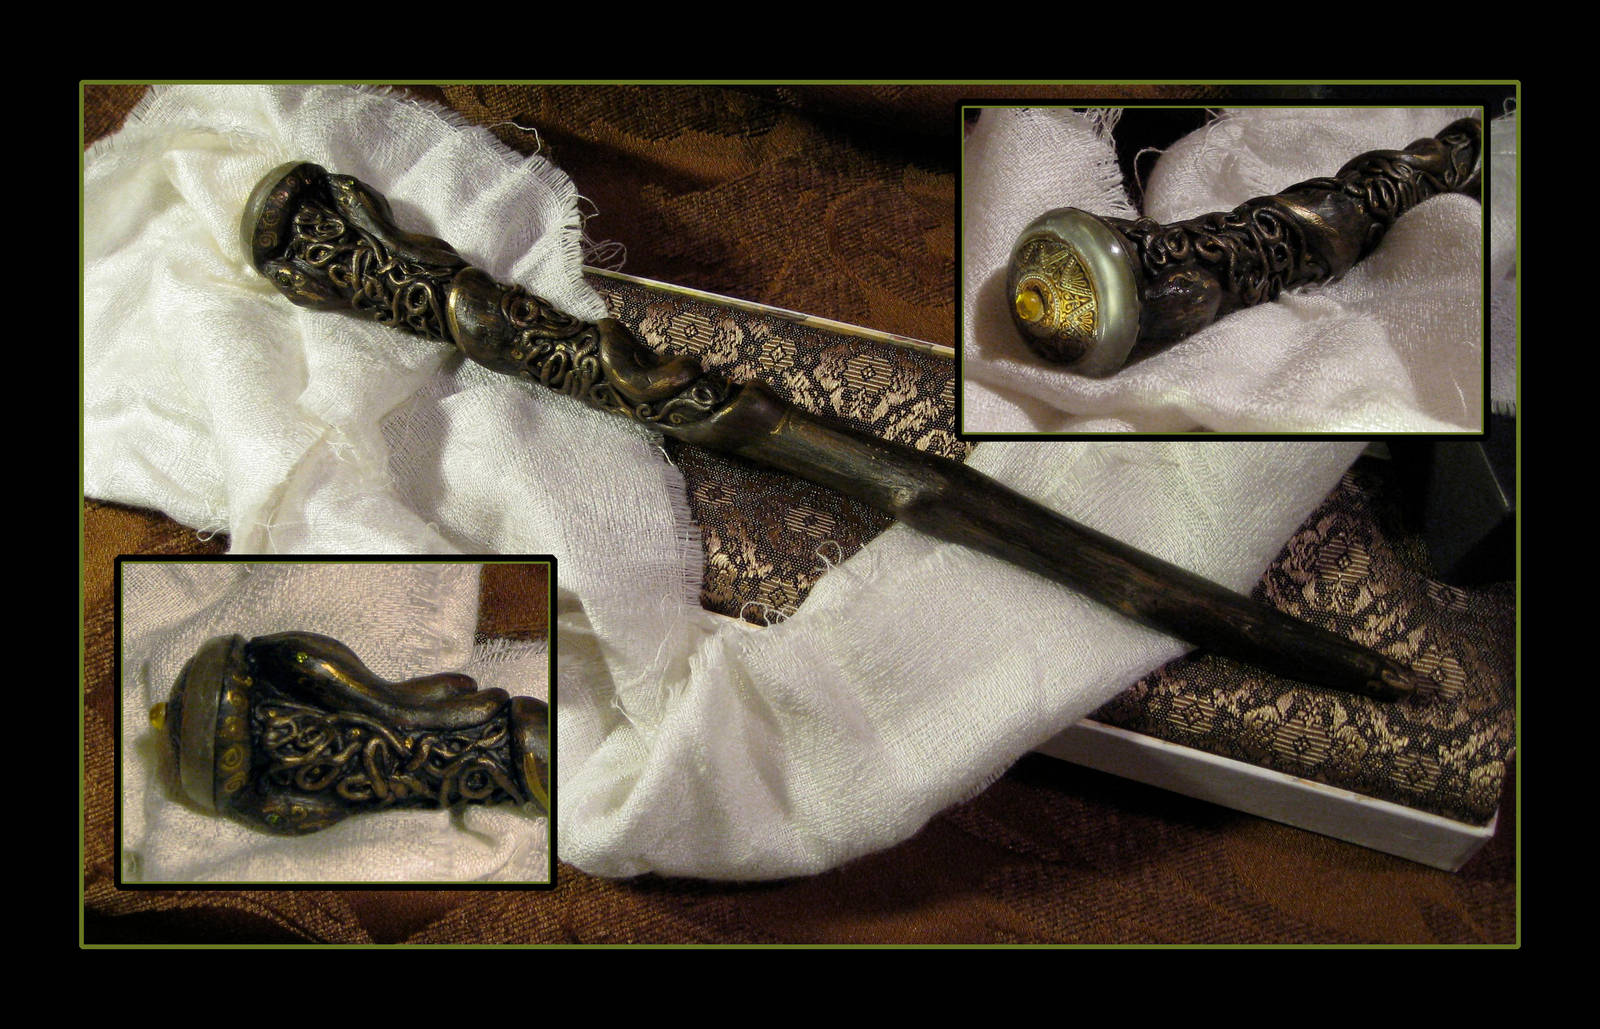 |
| This is the Amphisbaena Wand by hever on Deviant Art. Stunning clay work on the handle! |
 |
| These wands by DynamicAlley (Deviant Art, Etsy) are amazing! She takes custom orders too! |
First, the cons:
- Durability. Polymer clay will break more easily than wood if you drop it. It can feel more substantial than some lightweight woods, but at the risk of being more brittle (relatively speaking).
- Required tools. You need an oven big enough to fit your wand that people in more compact housing might not have access to.
- Limits on design. You definitely have more flexibility with design compared to both woodcarving and hot glue, but one thing polymer clay is poor at is thin layers.
Now the pros:
- Ease of crafting. Doing raised designs like vines and leaves is a lot easier with additive sculpture methods, like clay, than it is with subtractive methods. Easier crafting means less time required too!
- Flexibility with colors. You can use colors like blues and reds that would be considered unorthodox or rare for wood and still make the wand look natural. Get even more variation with paint by distressing or adding fake wood grain.
- Safety. Similar to hot glue wands, there's no risk of cutting yourself or breathing in sawdust from wood.
- Error forgiveness. If you make a mistake with clay, it's easy to fix because you can freely take away or add material, the latter of which you can't do with wood.
We've looked at two of the more common methods of wandmaking that don't involve carving wood, but there are certainly others, like 3D printing or sculpting with resin. Which methods have you tried? Do you know of any pros or cons that I missed? Let me know in the comments!
See you on the next page!
Comments
Post a Comment
Add to the discussion! Please keep things respectful and appropriate.